Showing posts with label AIO. Show all posts

Wednesday, May 11, 2016

Doll Room Tours -- Beth's Room

Jessica from Lunaville Dolls recently asked if I could do updated tours of my doll rooms. I thought that was a great idea! Since there are a lot of pictures, each room will have a separate post.

First up is Beth's room! Her room is themed red and blue, with Adventures in Odyssey items/decorations.


So this is an overview of her room...


First of all on the right wall by her bed she has a white wooden bed stand that I made. On the bottom shelf Beth has some Adventures in Odyssey albums (tutorial here), as well as her AIO ID card. On the second shelf up, she has another AIO album and a necklace.


On the top of her bed stand, Beth has a yellow candle and an AIO passport booklet.


Her bed is made from foam board and her blanket is fleece. Her pillow is red flannel. She keeps her Goofy stuffy on her bed :)


Above the bed I put this painting I made.


Now for the back wall! 


At the top of the wall, there are AIO letters that say Beth's name.


Below is a poster.


On the floor, Beth has a fur rug, which is just a piece of fabric from an old hoodie.


To the left and underneath the bed are some AIO cut and folds that Beth plays with.


 Finally, the left wall has a hook for her hat and cardigans. Above, is a shelf with a toy and a Tomorrowland "pin" I made from Shrink Paper.


That concludes the overview of Beth's bedroom! Next up will be Maggie and Brooke's room!

Sunday, January 24, 2016

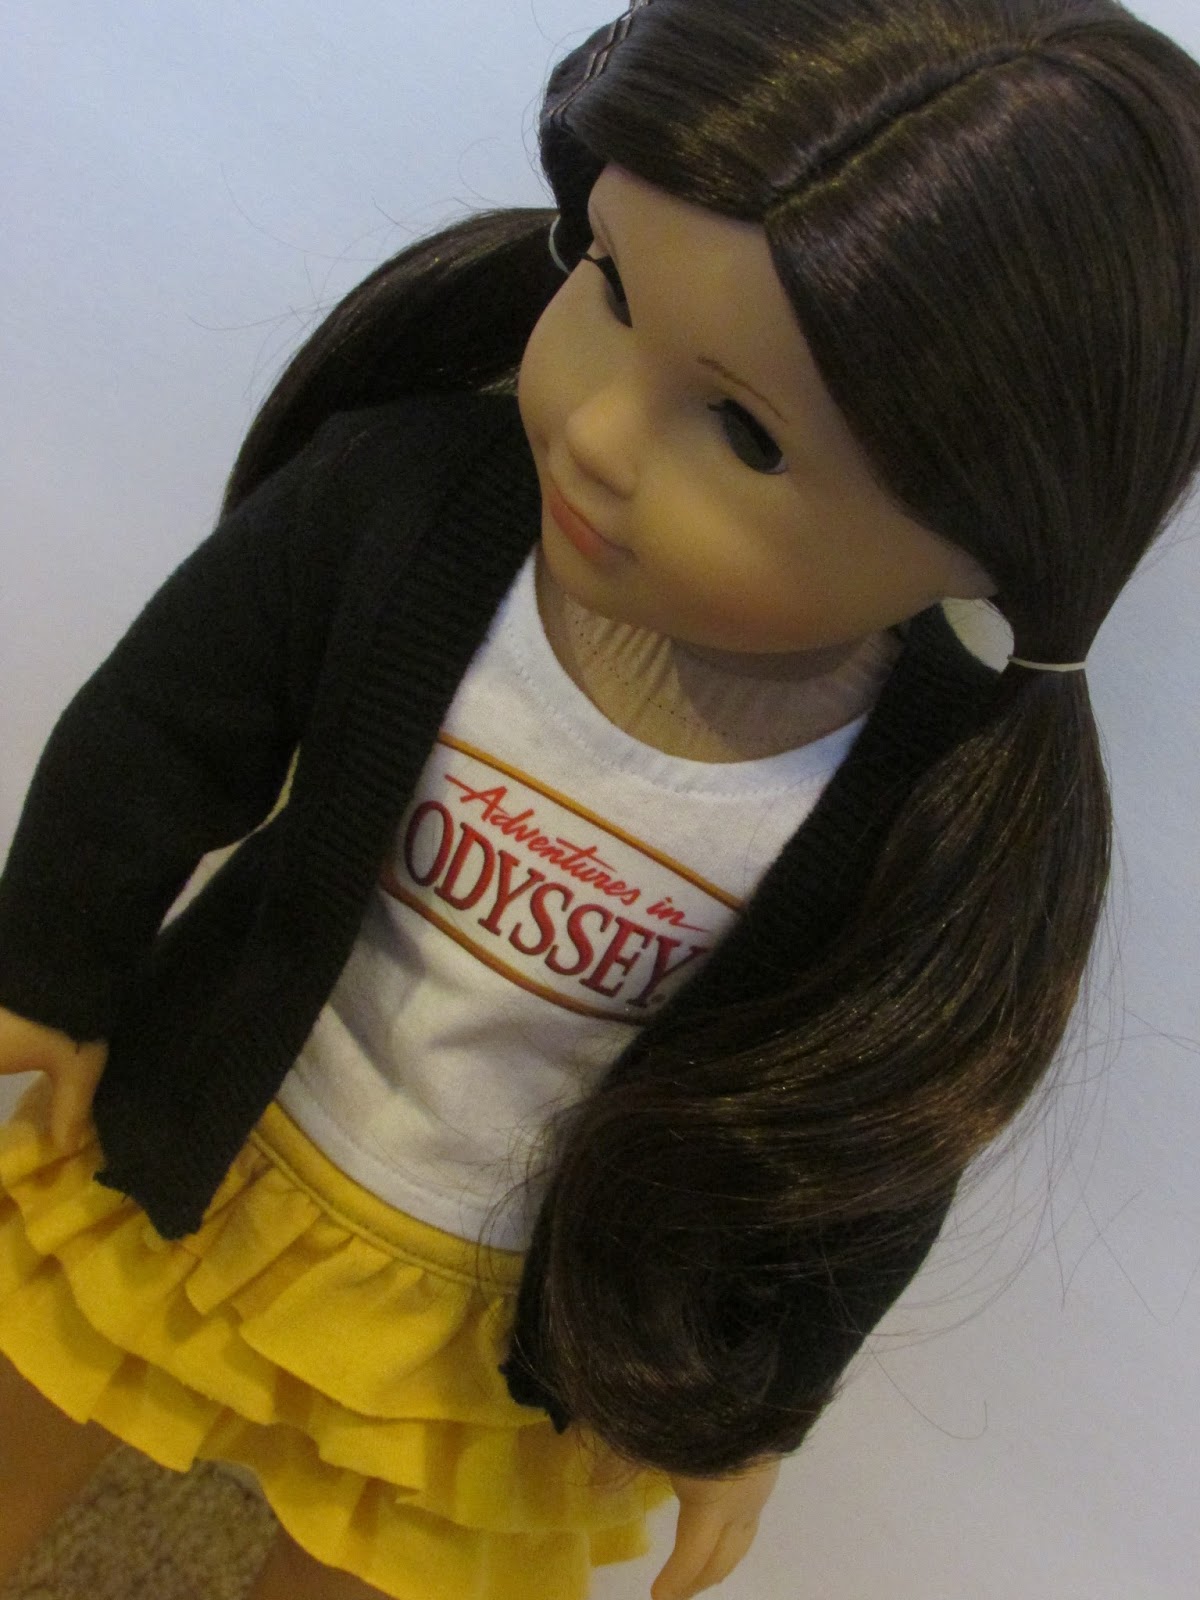
Beth's New Cardigan and Modeling Her Newest Outfit

This week I made Beth a black cardigan! I used the Liberty Jane pattern hack tutorial on Pixie Faire. The fabric I used was from a black sweater.

She is wearing the cardigan with the outfit she got for Christmas.

 
The AIO t-shirt I made with the free patter on Pixie Faire. I applied the AIO logo with an iron on transfer.
 
 
The skirt I made with the skirt variation of the Faraway Downs Dress pattern on Pixie Faire. I used a yellow t-shirt for the fabric.


Beth loves her new outfit!

Sunday, December 27, 2015

How to Make a Doll CD Case!

Today I will show you how I made the AIO CD case that Beth got for Christmas! It's an easy craft that turns out super cute, and you probably have all the needed items already!


Tools I used:

- Xacto knife (to cut the cardboard, but you can also use the scissors to do this)
- Scissors
- Printer
- Paper
- Cardboard
- Glue Stick (or other type of glue, but this worked well for me)
- Masking Tape

 
First, find an image that you would like to use for the front cover of the CD case. I found mine by doing a quick Google search. I was able to find JPEGS of both the front and the back of the CD case. I printed the images to be about 2 inches wide.
 
Also, print a strip of solid color that matches the front cover image. I was able to get the exact color using the eyedropper in Microsoft Paint. The color strip should be 1" by 11", or 2" by 5.5" cut in half down the middle.

 
Cut out the images.

 
Next, trace the images onto your cardboard. I needed to do this three times, so that each piece glued on the next would make the CD case about 3/4 of a 1/4" thick. So, basically, almost 1/4" thick.
 
Glue the cardboard together so you get this:
 
 
Now take your strip of color. It should be about 1" by 11", but I had that was 2" by 5.5", so I just cut it in half down the middle.

 
The other images will cover up the front and back of the cardboard, but the color strip is to cover the sides. Glue the sides of the cardboard square and attach the paper, folded it carefully at the edges.

 
Do this all the way around.

 
The sides are covered!

 
Glue the front cover image to the cardboard.


And the back...

 
This is optional, but I had an extra copy of the front and back images (which I originally printed to test the size). Therefore, I cut out where it said the title of the album "Taking the Plunge" on the extra copy, and glued it to the side of the CD case to add detail. 


To give it a shiny CD case look, I covered the front and back with masking tape. I laid it sticky side up, then set the album on the tape. I then cut the tape, and then fit it to the size of the image with scissors. Or, you could just cover the sides too, but I just wanted to cover one side, the front, and the back.

 
Finished front with masking tape:

 
Finished back with masking tape:

 
The finished CD!